
PowerDNS admin Setup
Goal of this lab is to setup PowerdnsAdmin UI. This is a web-based UI that we will spin on docker. As we will use PowerDNS API to connect to PowerDNS Server
Open powerdns conf file and add four line to enable web services for API along with ACL and Key to access API. Please generate a random key and add in place of [RANDOM-KEY] in the config below:
webserver-address=0.0.0.0
webserver-allow-from=127.0.0.1,::1,10.0.0.0/8,172.16.0.0/12,192.168.0.0/16
api=yes
api-key=[RANDOM-KEY]
And restart pdns
Note: Update the password in both app and the db container with a randomly generated password.
#vi docker-compose.yml
version: "3"

services:
  app:
    image: powerdnsadmin/pda-legacy:latest
    container_name: powerdns_admin
    restart: unless-stopped
    # ports:
    #   - "9191:80"
    logging:
      driver: json-file
      options:
        max-size: 50m
    environment:
      - SQLALCHEMY_DATABASE_URI=mysql://pdns:exK2Ad69cVdFof@db/pdns
      - GUNICORN_TIMEOUT=60
      - GUNICORN_WORKERS=2
      - GUNICORN_LOGLEVEL=DEBUG
    depends_on:
      - db

  db:
      image: mysql
      command: --default-authentication-plugin=mysql_native_password
      restart: unless-stopped
      environment:
        MYSQL_ROOT_PASSWORD: NaFwJPAEur943R
        MYSQL_ROOT_HOST: '%'
        MYSQL_DATABASE: pdns
        MYSQL_USER: pdns
        MYSQL_PASSWORD: exK2Ad69cVdFof
      volumes:
        - mysql:/var/lib/mysql

  proxy:
    image: 'caddy:latest'
    restart: unless-stopped
    ports:
      - '80:80'
      - '443:443'
    volumes:
      - ./Caddyfile:/etc/caddy/Caddyfile
      - caddy_data:/data
      - caddy_config:/config

volumes:
    mysql:
    caddy_data:
    caddy_config:
# Caddyfile
a01.learndns.info {
    reverse_proxy app:80
}
docker compose -f docker-compose.yml up -d
Once the docker is up you should be able to browse the site on URL: https://a01.learndns.info
Visit your installation URL and click on “Create an account” and fill the details and click “register”. Once account is created, go to: Left bar > Settings > Authentication and uncheck “Allow users to signup”

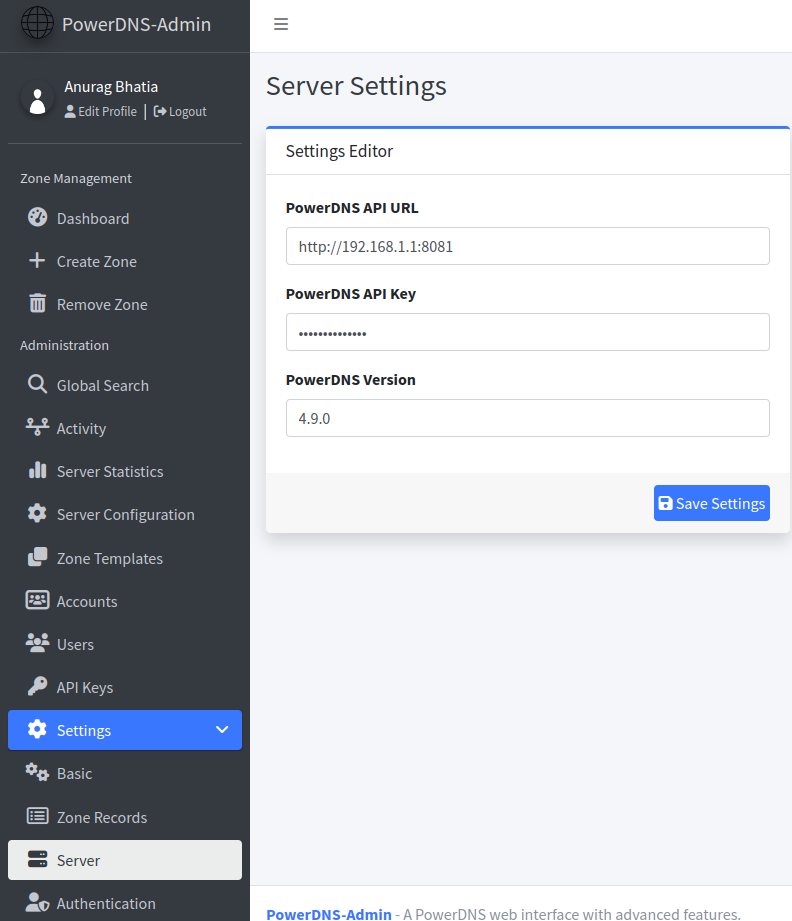
Navigate to Settings>Server.
Enable SOA records in zone records:
PowerDNS admin > Zone records > Check SOA
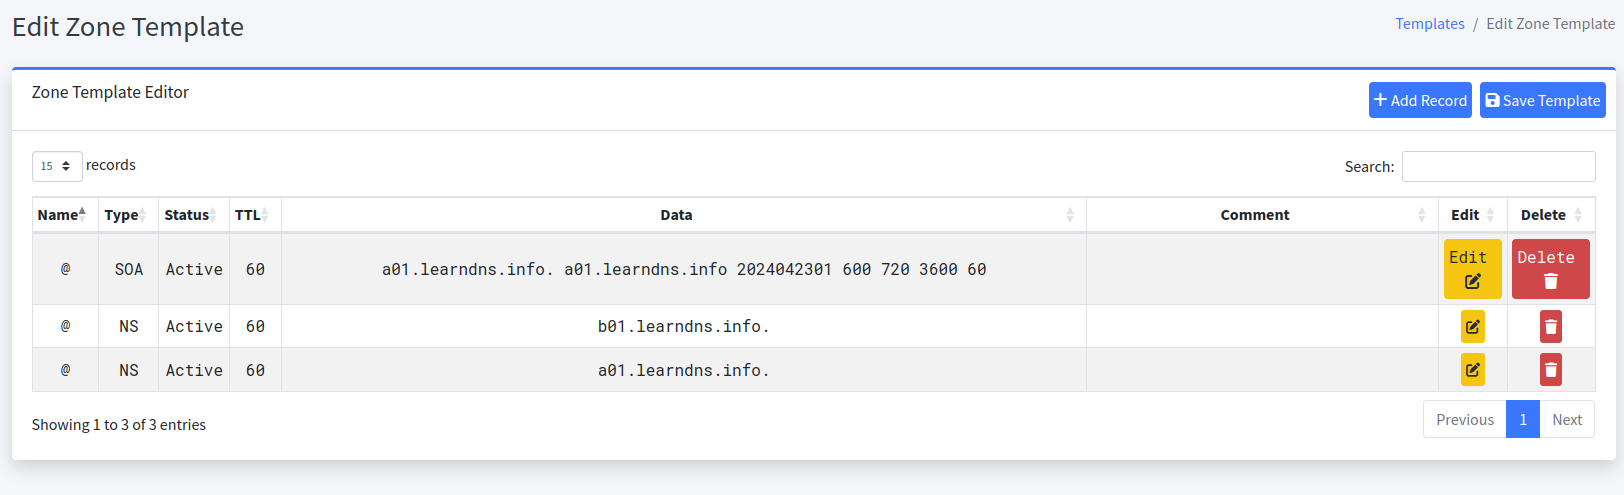
Click on “Zone Templates” on left side bar and select basic_template_1 and add following three records:
- @ NS with TTL 5 mins and data as your primary nameserver (e.g a01.learndns.info.)
- @ NS with TTL 5 mins and data as your secondary nameserver (e.g a01.learndns.info.)
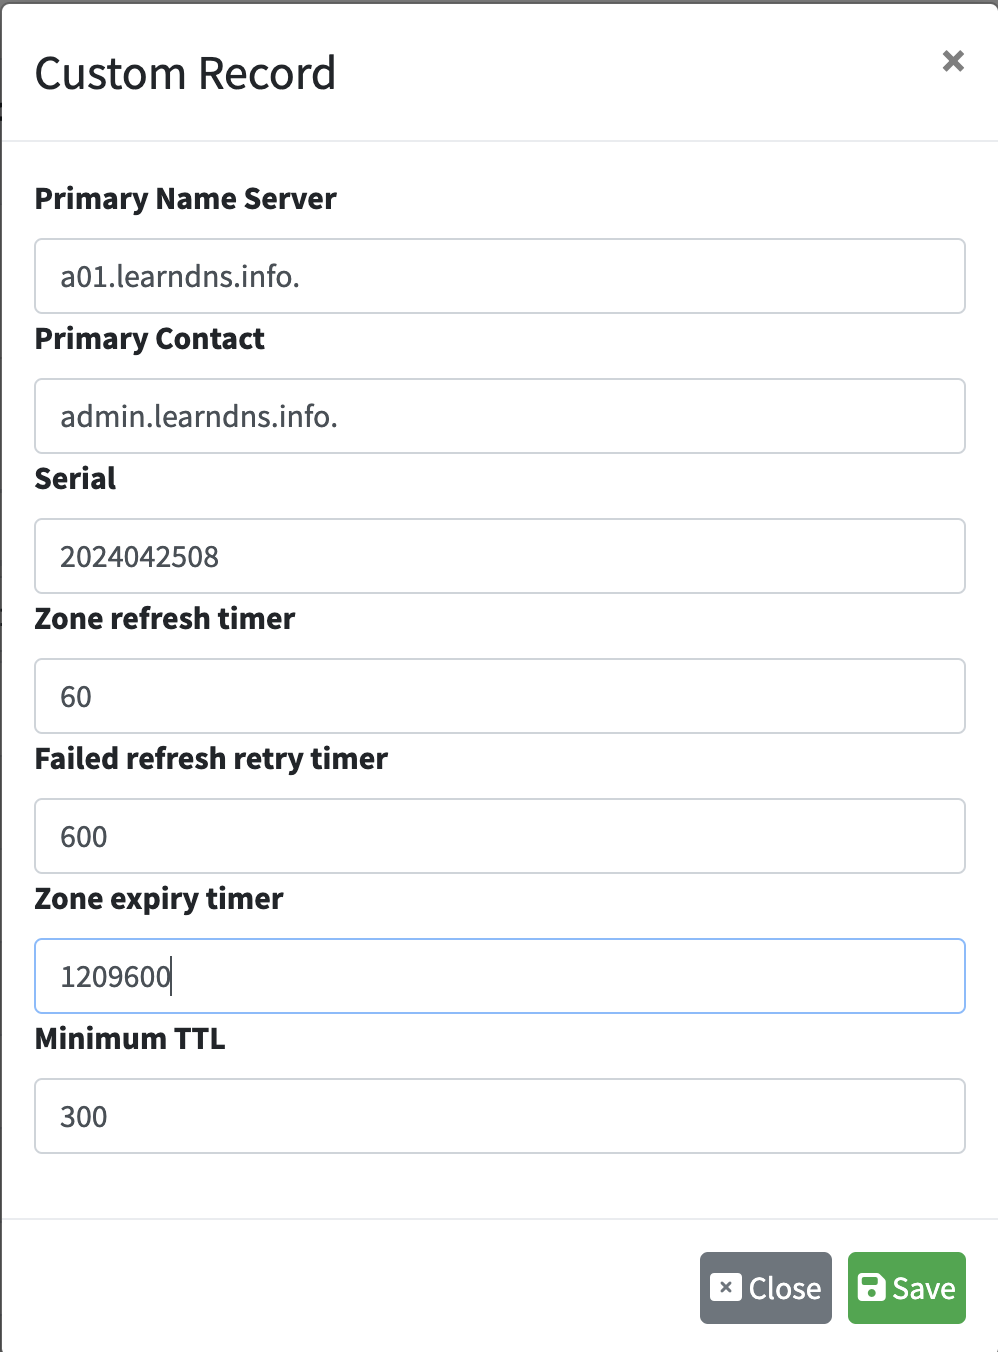
- @ SOA with TTL 5 mins, with primary server, primary contact, serial etc as shown in picture below:
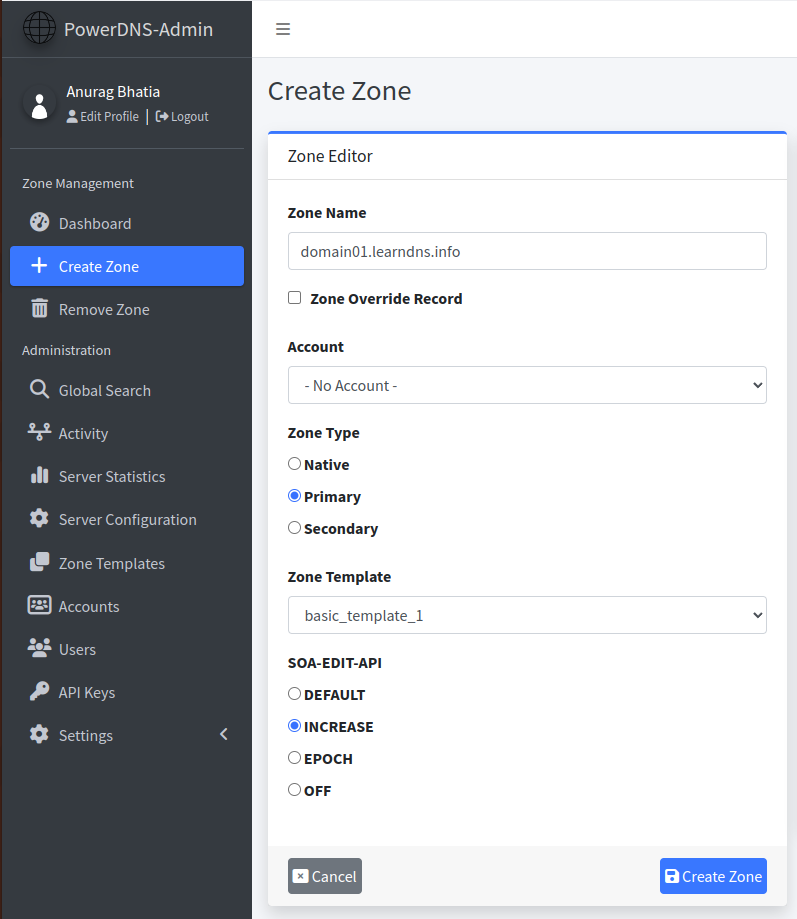
Allocate your domain name based on list as visible here. E.g for attendee 01, domain name is domain01.learndns.info.
Query on primary
anurag@a01:~$ dig @a01.learndns.info domain01.learndns.info ns +short
a01.learndns.info.
b01.learndns.info.


anurag@a01:~$ dig @a01.learndns.info domain01.learndns.info soa +short
a01.learndns.info. me.anuragbhatia.com. 2024042302 600 720 3600 60
Query on secondary (test this after 1min wait after adding record in the previous step)
anurag@a01:~$ dig @b01.learndns.info domain01.learndns.info ns +short
a01.learndns.info.
b01.learndns.info.

anurag@a01:~$ dig @b01.learndns.info domain01.learndns.info soa +short
a01.learndns.info. me.anuragbhatia.com. 2024042302 600 720 3600 60